


MT Market Bag - Free Tutorial
- Jul 29, 2016
- 5 min read
It's time for a new project, don't you think?!
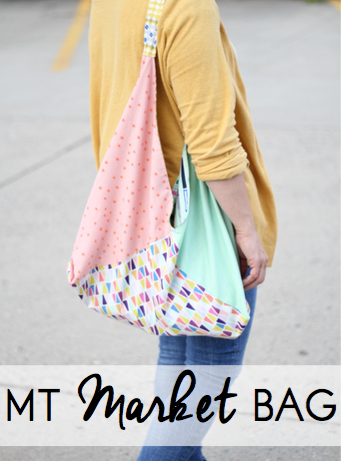
The MT Market Bag is our version of the classic Japanese Bento Bag! Scaled up with an added handle, it's going to be the bag you reach for in a pinch and the bag all your friends want you to make them! Here's why it's so great:
1. You get to use 6 of your FAVORITE fat quarters!
If you had fun picking fat quarters for the Fat Quarter Cowl, you will love this! The possibilities are endless and there is so much less pressure when it's just a fun bag. Personalize a Market Bag for all your friends and family with their favorite fabrics!
2. It goes together in a flash, but with great finishing details like lining and boxed corners.
This is definitely a quick and easy project, but that doesn't mean it has to look that way! We took the typical bento bag and kicked it up a notch with a full lining, just a little top stitching, and a handle that makes it really comfortable to carry.
3. It super lightweight and easy to grab and go!
The MT Market Bag can easily be folded up and stashed away when not in use. Keep one in your car for those impromptu shopping trips. It's also perfect for travel! It takes up very little space in your luggage, but can be that extra bag we all wish we had on vacation.
Are you ready to dive in? Here's what you need:
6 fat quarters.
That's it! Really!
Stop in to grab a bundle just like our or mix and match your favorite fat quarters!

Let's get started!
Cut all 6 fat quarters into 16-1/2" squares. Choose one fabric to be your handle and reserve that fabric's scrap.

If you start mass producing Market Bags for everyone in your life, we highly recommend investing in an 18-1/2" square Creative Grids ruler. This makes it easy to stack your fat quarters up and cut them all at once without shifting your fabric. If you just have plans for one or two Market Bags then your average ruler can work just fine.
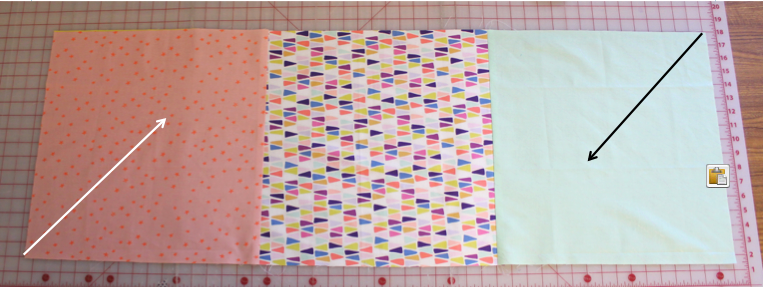
Choose 3 fabrics to be the outside of the bag. The remaining 3 will be the lining. Sew the 3 outside fabrics together to form one long strip. Press the seams to the side.
With the right side of your fabric up, fold the lower left corner up diagonally toward the seam on the left. Press the fold line well. Next fold the upper right corner down diagonally toward the seam on the right. Press this fold line as well.
Here's what your fabric should look like at this point.

Fold the new lower right corner up to create a fold line diagonally through the center block.
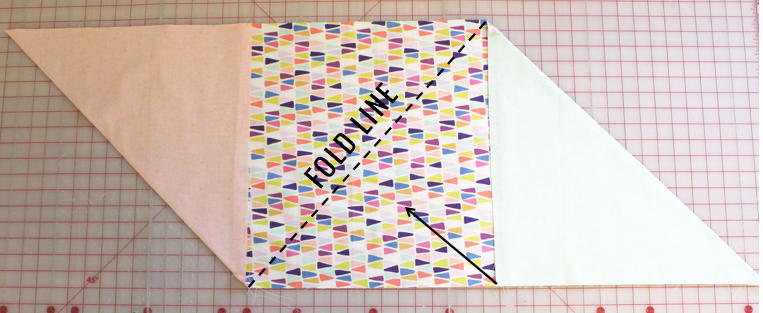
Your fabric will look like this now:

Without moving the fabric, pin or clip the right sides together where the left triangle meets the center. You will need to flip the raw edges out a bit to match up the right sides. Once you have it securely pinned or clipped, flip the whole bag over and repeat this step for the seam on the other side. It will be in the same location as the picture below for both sides.
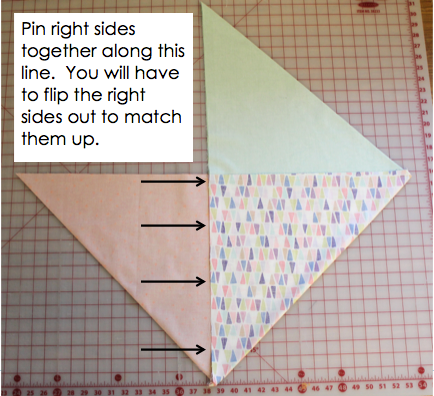
Once the bag is pinned on both sides you can take it to the sewing machine to sew this seam. (A 1/2" seam allowance is used throughout unless otherwise stated.)

Please note that as you sew this seam the rest of the bag will feel like its disassembling and you might think it doesn't make sense anymore. Do not fear! Trust the seams you pinned together and continue on sewing. Once you've completed both seams you can layout the bag again and see that it does in fact all work!
Repeat these steps with the remaining 3 fat quarters for the lining of your Market Bag.
(And once you have the hang of this, assembly line these steps for the outside and lining of multiple bags and you'll be done with them all in no time!)
Turn the outside of the Market Bag right side out. Keep the lining inside out. Insert the outside of the bag into the lining as shown below.

Match up the raw edges and pin one side, right sides together. Sew from the upper left corner to the center "V", then stop with your needle down to pivot and continue sewing to the upper right corner. Break the thread, flip the bag over and pin this side together. Sew the seam on this side of the bag from the upper left to center just like before, but leave an opening between the center and upper right corner in order to turn your bag right side out.

Clip into the "V" at the center point of each side of the bag. This will help the bag lay nice and flat once it is turned out. Trim any excess fabric from this section as well.

Turn the bag right side out and press the seam well, tucking in the raw edges of the opening and pinning them in place. Top stitch the opening of the bag all the way around using a 1/4" seam allowance. Make sure the raw edges are tucked in and the hole is securely closed with the top stitching.
Next it's time to make the handle!
Find the fat quarter scrap that you chose to be the handle of your bag. It should be about 4-1/4" x 18". Straighten it up and trim it down to 16" long. Fold the short ends in 1/2" and press in place. Then fold in half lengthwise, right sides together and press. Stitch the long side with a 1/4" seam allowance.

Turn the handle right side out and press with the seam across the bottom center. Make sure the raw edges of the short end are still tucked in. Insert the top corner of one side of the bag into one end of the handle. Make sure enough of the triangle tip is inside the handle to secure it, but not so much that it bunches. Pin in place.

Top stitch the handle in place 1/4" from the edge. Repeat for the opposite side, being sure not to twist the handle. Top stitch through the handle as desired to add some stiffness and added detail.

The last step is to create a boxed corner on the bag! This is an optional step, but we think it creates a nice shape. With the bag right side out, fold up one corner of the bag 2" and clip in place.
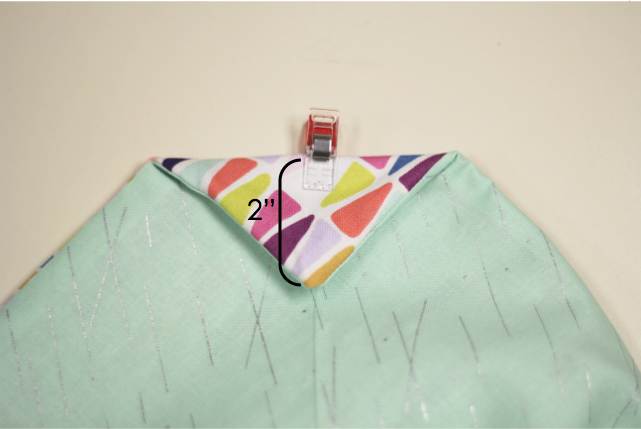
Stitch the tip of the triangle in place on your sewing machine by going back and forth neatly over the spot a few stitches. Repeat for the opposite corner.


That's it! Your MT Market Bag is complete! Ready for the next one? Our simplified instruction sheet can be found here. Once you've got the hang of it the simple illustration below might be all you need to make an MT Market Bag for all of your friends!

Share your MT Market Bag projects with us using #humansofmt #moderntextiles or #MTmarketbag
Happy Sewing!
Comments